Report Page
Object Title(s)
One can edit the appearance of object title(s) through the webconfig-model.xml file (See Text and messages).
Let us suppose we want to have a default way of displaying bio entities like gene, protein or probe set. Thus we would look up the entry for bio entity class and add the following configuration:
<class className="org.intermine.model.bio.BioEntity">
    <headerconfig>
        <titles>
            <title mainTitles="symbol|primaryIdentifier" numberOfMainTitlesToShow="1" subTitles="*organism.shortName*" />
        </titles>
    </headerconfig>
</class>

We see that the titles are defined within the headerconfig block. Then we have the following fields:
mainTitles- a vertical bar (|) separated list of keys for which we would like to see values.
numberOfMainTitlesToShow(optional)- this property is useful if we want to only show a maximum of one value in the title. As per our example the system will first try to resolve the “symbol” of the BioEntity, if it is known, we will show just that. However, if a symbol is not provided, then we try to resolve the primaryIdentifier. The system thus follows left-to-right rule when deciding what and how many fields to show. Main titles will always be bold.
subTitlesthis is where we define sub titles. Again we can use the vertical bar to define a number of key values to display. Subtitles can be displayed in three ways based on the tags around them that define element formatting:
primaryIdentifier(default): the element will be displayed without any formatting applied*primaryIdentifier*: the element will be in italics, useful for organism names[primaryIdentifier]: the value will appear in square brackets
Note
Classes of objects inherit from their parents, thus unless we provide a different configuration for a, say, Protein title, the formatting from BioEntity will be applied. Fields resolved in the title(s) will be removed from the summary below it.
Custom Header Link
One can have a custom link in the header of the page through the webconfig-model.xml file.
<headerconfig>
    <customlinks>
        <customlink
            url="http://flybase.org/reports/{primaryIdentifier}.html"
            image="flybase_logo_link.png"
        />
    </customlinks>
</headerconfig>
The example above has been inserted as a child of the Gene class <class className="org.intermine.model.bio.Gene">. The parameters are as follows:
url- this is where we specify the target of the link. The item in the curly brackets is a variable parameter that will get resolved as a property for the current object.
image(optional)- defines a name of the image from “model/images” (e.g.:
webapp/src/main/webapp/model/images) to resolve. text(optional)- defines a link text that will appear (next to an image if provided). The link will then appear in the top right corner of the header. If no image or text is provided, the link text will default to the URL.
Note
The order the fields appear in your webconfig-model is the order in which they will appear on the report page (left to right).
References & Collections
Each object has a number of fields configured in the model, like length or proteins for Gene. The first is a reference to a single value or an object, the latter is a list of values/objects. These then appear on the report page as References and Collections.
To configure in which category on the page these are to show, follow Website Admin.
Additionally, one can decide to either show the old style “inline tables” or use the new Results Tables JS library when displaying these. To enable the latter, edit your web.properties as follows:
inline.collections.in.tables = true
This will display any inline collections in table widgets. Inline collections appear expanded by default and can be manually collapsed by the user. To make all inline collections appear as collapsed, add or edit the following property in your web.properties:
web.collections.expandonload=false
If use.localstorage is true, and localStorage is available, then a particular collection’s expanded or collapsed state will be remembered and not overriden by the default state property.
use.localstorage = true
Inline Lists
Inline lists are lists of values in one column of a report page table, displayed in one line. Take ‘’dataSets’’ on a Gene object as follows:
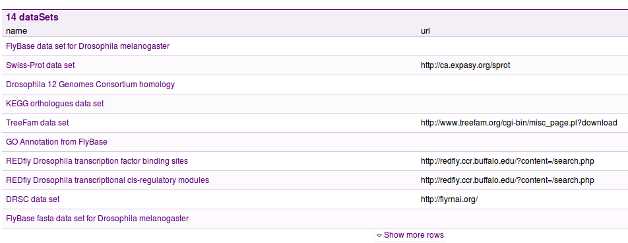
Perhaps we would like to only display the names of data sets available. Then, we would add the following to the Gene class (<class className="org.intermine.model.bio.Gene">) in the webconfig-model.xml file:
<inlinelist>
    <table path="dataSets.name" />
</inlinelist>
The result:

Let’s go through the available configuration:
path- refers to the reference or collection and a key (separated by a dot) that refers to a column (key) we want to display.
showInHeader(optional)- a boolean attribute that, if set to true, will make the list appear in the header section of the page.
lineLength(optional)- defines the number of characters we would like to show in the list, any content after this length will be revealed upon clicking an “Expand” link. Bear in mind that the line length will not be exact as it will not split words in half.
showLinksToObjects(optional)- by specifying this boolean attribute we can create links from the list to the individual objects the list refers to.
If we have not set an inline list to appear in the header section of the page, the list will, by default appear in the category “Other” on the report page. If we login to the system we can then (through the report page tagging interface that is revealed to us) tag the list to appear in a specific section.
Custom Displayers
See Report Displayers for details on how to create displayers for the report page.
Templates
Tag template with the im:report tag. See Website Admin.
The template needs to have only one where clause involving the class of the object.
You also need to specify an aspect whithin the report page where the template will appear (e.g. im:aspect:Genomics)
Templates appear collapsed by default. To make all templates appear expanded when a report page is loaded, add or edit the following property in your web.properties:
web.templates.expandonload=true
As with collections (see above), if use.localstorage is enabled and available, then a particular template’s expanded or collapsed state will be remembered and not overriden by the default state property.
Warning
The underlying query that populates a template is executed as the template is expanded. Setting web.templates.expandonload to true can cause a significant increase in a report page’s load time, particularly if there are more than a handful of templates.
Data
See Data and Widget Configuration for details on how to change the names of class and fields.
You can also hide collections by tagging them with the im:hidden tag.